

First off you'll need the two pattern pages. For the shirt click here and for the pants click here to download them. If you haven't used google docs before you click the arrow in the left hand corner to download the files.
For the shirt you'll need knit fabric. With the pants you can use pretty much anything. I did a couple with flannel and then a pair with corduroy. I am thinking about slimming the pattern down and trying leggings with a knit fabric in the future. Your other materials will be about 4" of velcro. I cut some wider stuff I had in half, but really any width between 1/4" and 1/2" will work. And Fold Over Elastic (FOE). You'll need 14.5" total. I like to pick mine up when Pick your Plum has a sale but you can get it at JoAnn's. It seems to be popping up more all the time. I used it for this project since it does the binding and gathering all in one step and gives a nice finished look. (Plus I have lots of it, and just ordered more!)
Once you have your pattern pieces all cut out we are ready to go! We will be making the pants first. All seams are 1/4" unless I tell you otherwise. Also I do have a serger, so I used it to finish my seams. But it isn't necessary. The top is knit so that won't fray and for the pants if it frays it's not a big deal, if you are picky like me you could do a zigzag stitch to finish your seams if you want.

1) First sew a 1/2" hem on the bottom of each pant piece. It is much easier to do this now than when it is a tiny circle later. :)


2) Next we will sew the pant legs down the inseam. Start at the point and sew to the hem. Don't sew up the crotch in this step!


3) Now turn one leg right side out and insert it into the other leg with right sides together.
 |


6) Now pin the elastic to the pants right sides together and sew the elastic on. The top of the pants should match up with the top of edge of the elastic. Sew with a 1/4" seams, that should be matching up with the center line on the elastic. Stretch the elastic as you go to make it lay flat against the pants. I didn't get a picture of the pinning part. (working late at night has it's downfalls) Here is the pants once the elastic is sewn on.

7) Finished! I like to iron when I'm done to make everything look nicer. If I was really good I'd iron after each step but I usually forget! The raw edge of the pants will fold down leaving a nice finished waist.


1) First cut out your pieces and start by sewing the shoulders together using a 1/4" seam. (Again all seams are 1/4" unless I mention something different.)


2) Next we'll sew the sleeves onto the bodice. Take your time here, when sewing tiny things you have to be patient. :) (At least that is what I tell myself)


3) We can now hem the sleeves. Use a 1/2" hem here.

4) Now we sew down the arm and side. Pin first, make sure you put a pin in the armpit matching up your seams.


5) Next we'll sew the hem at the bottom of the shirt. Do this with a 1/2" hem as well.

6) Things are coming along nicely. We should have something that looks like a shirt. Onto the FOE for the neck. Take the remaining 7" piece of elastic and mark the mid-point. Next with the back of the elastic and the back of your shirt touching pin it together. Match the center mark on the elastic with the center of the shirt. Use the line in the center of the elastic to match up the edge of the fabric with. I first pin the mid-point and then the ends and then stretch to pin the rest.

7) Now sew that on, stretching the elastic as you go to make it lay flat. See my fingers at the bottom of the picture, I'm pulling gently on the elastic.

8) Then fold the elastic back over the edge of the fabric to enclose it. Sew that down, stretching the elastic as you go once more.

9) All we have left is the back! Fold over each side by 1/2" and sew it down.

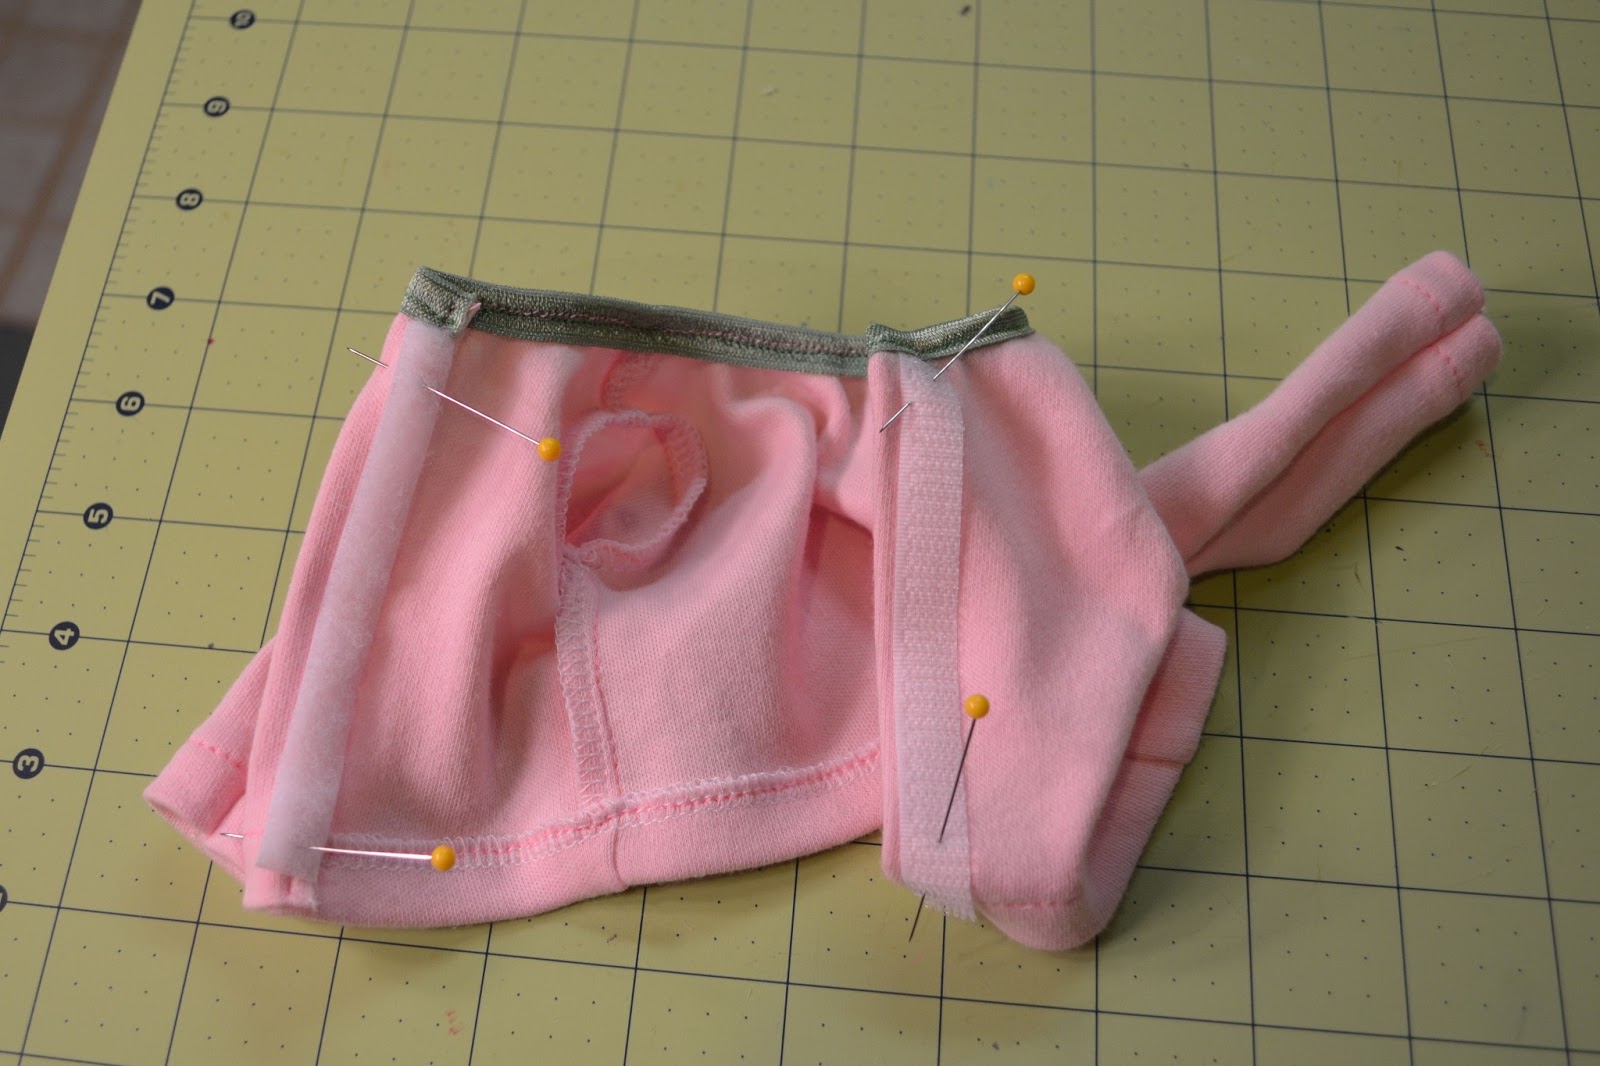
10) Finally we'll attach the velcro. Take one of your pieces and pin it to the outside of the shirt and the on other on the inside as shown. Sew the velcro on and your done! Again I would iron it so it lays nicely.
You can add a design on the front if you want. I did it for one shirt. To do it I simply cut out the image I wanted and used Wonder Under to adhere it to the shirt and then sewed around it.
Here are the 3 outfits I made. The are wildly popular with my daughter but of course now she has a whole list of other clothes she wants. :)

Thank you! I pinned this, I know how to assemble clothes, but having the wee pattern is fantastic. I will have to shrink it down to fit our baby of choice, my little girl will be thrilled to have some clothing for her baby(ies).
ReplyDeleteI was in the same boat as you! Tiny clothes just seem harder! Thanks for your comment. :)
DeleteThis is wonderful! I have had many requests for Cinderella and Rapunzel to have nightgowns. I lengthened your shirt pattern to be a nightgown. This was my first experience making doll clothing and your directions are fantastic! Thanks for sharing!
ReplyDeleteI am SO thrilled that you found this pattern to be helpful! To be honest I haven't make a lot of doll clothes either so I just went about it in a logical manner, I'm glad you found it easy to follow! :)
DeleteThank you for sharing the pattern, I will for sure make my daughter a pj set for her doll. She has always wanted a toddler merida doll and I happened to find one on Saturday at a garage sale. (we were going to buy her a new one but this saved me lots of money!!) she was offended that her brave doll was wearing a teal coloured dress, its not strictly blue!! So I drafted her a new dress and made a blue on blue dress. its not easy with these tiny patterns but I loved it and want to make her a pj. My daughter wants me to make her blue tights and blue shoes lol. I am thinking of using one of my daughters old ripped tights to make the doll tights. That could be a good idea for you to try too!!!
ReplyDeleteThanks for the free pattern! I have looked all over the internet and all I can find is American Girl sized patterns. This will be perfect for my daughter who loves to play dress up!
ReplyDeleteThis is awesome! I want to make a matching doll and toddler set but I don't even know where to begin with the toddler size. Any ideas?
ReplyDeleteThank you! As a beginner to sewing- I'm SO delighted that you've posted this wonderful (and so necessary, for me) level of detail (notes and photos) on the jammies project! I will keep your page open as I go, and feel confident I will be able to make some fabulous jammies for my daughter's doll- I've bookmarked your page, and will be sewing these tomorrow!
ReplyDeletePS: Is there a stitch on my sewing machine I can use to "serge" the edges like you've done so neatly?
Corina
tHANK YOU FOR THESE NICE BASIC PATTERNS.
ReplyDeleteI will try this at home after work thank you!
ReplyDeleteThank you so much for this pattern. I'm new to sewing and I loved the detailed instructions. I also found that the tiny parts were frustrating until I had the idea to use scotch tape to hold the parts together. After that my sewing machine stopped eating my tiny fabric!
ReplyDeleteThanks and that i have a dandy supply: How Much Home Renovation Cost remodeling and renovation
ReplyDelete